Tour Stop Questionnaire lets you require a photo and add up to 3 inspection questions to any tour stop. Officers must complete these before their scan is confirmed. You can also set up email alerts that fire automatically when an officer’s answer meets a condition you define.
Setting up a tour stop (Admin)
Go to Client & Site, select the site, and open the Tour Stops tab. Click Add Tour Stop or the edit icon on an existing stop.
- Fill in the standard fields (Stop Name, Type, Message to Officer, Placement Instructions).
- Click Advanced ▸ at the bottom of the modal to expand the questionnaire settings.
- Turn on Require Photo if you want officers to take a photo at this stop.
- Click + Add a question to add an inspection question (up to 3 per stop).
- Click Save stop when done.
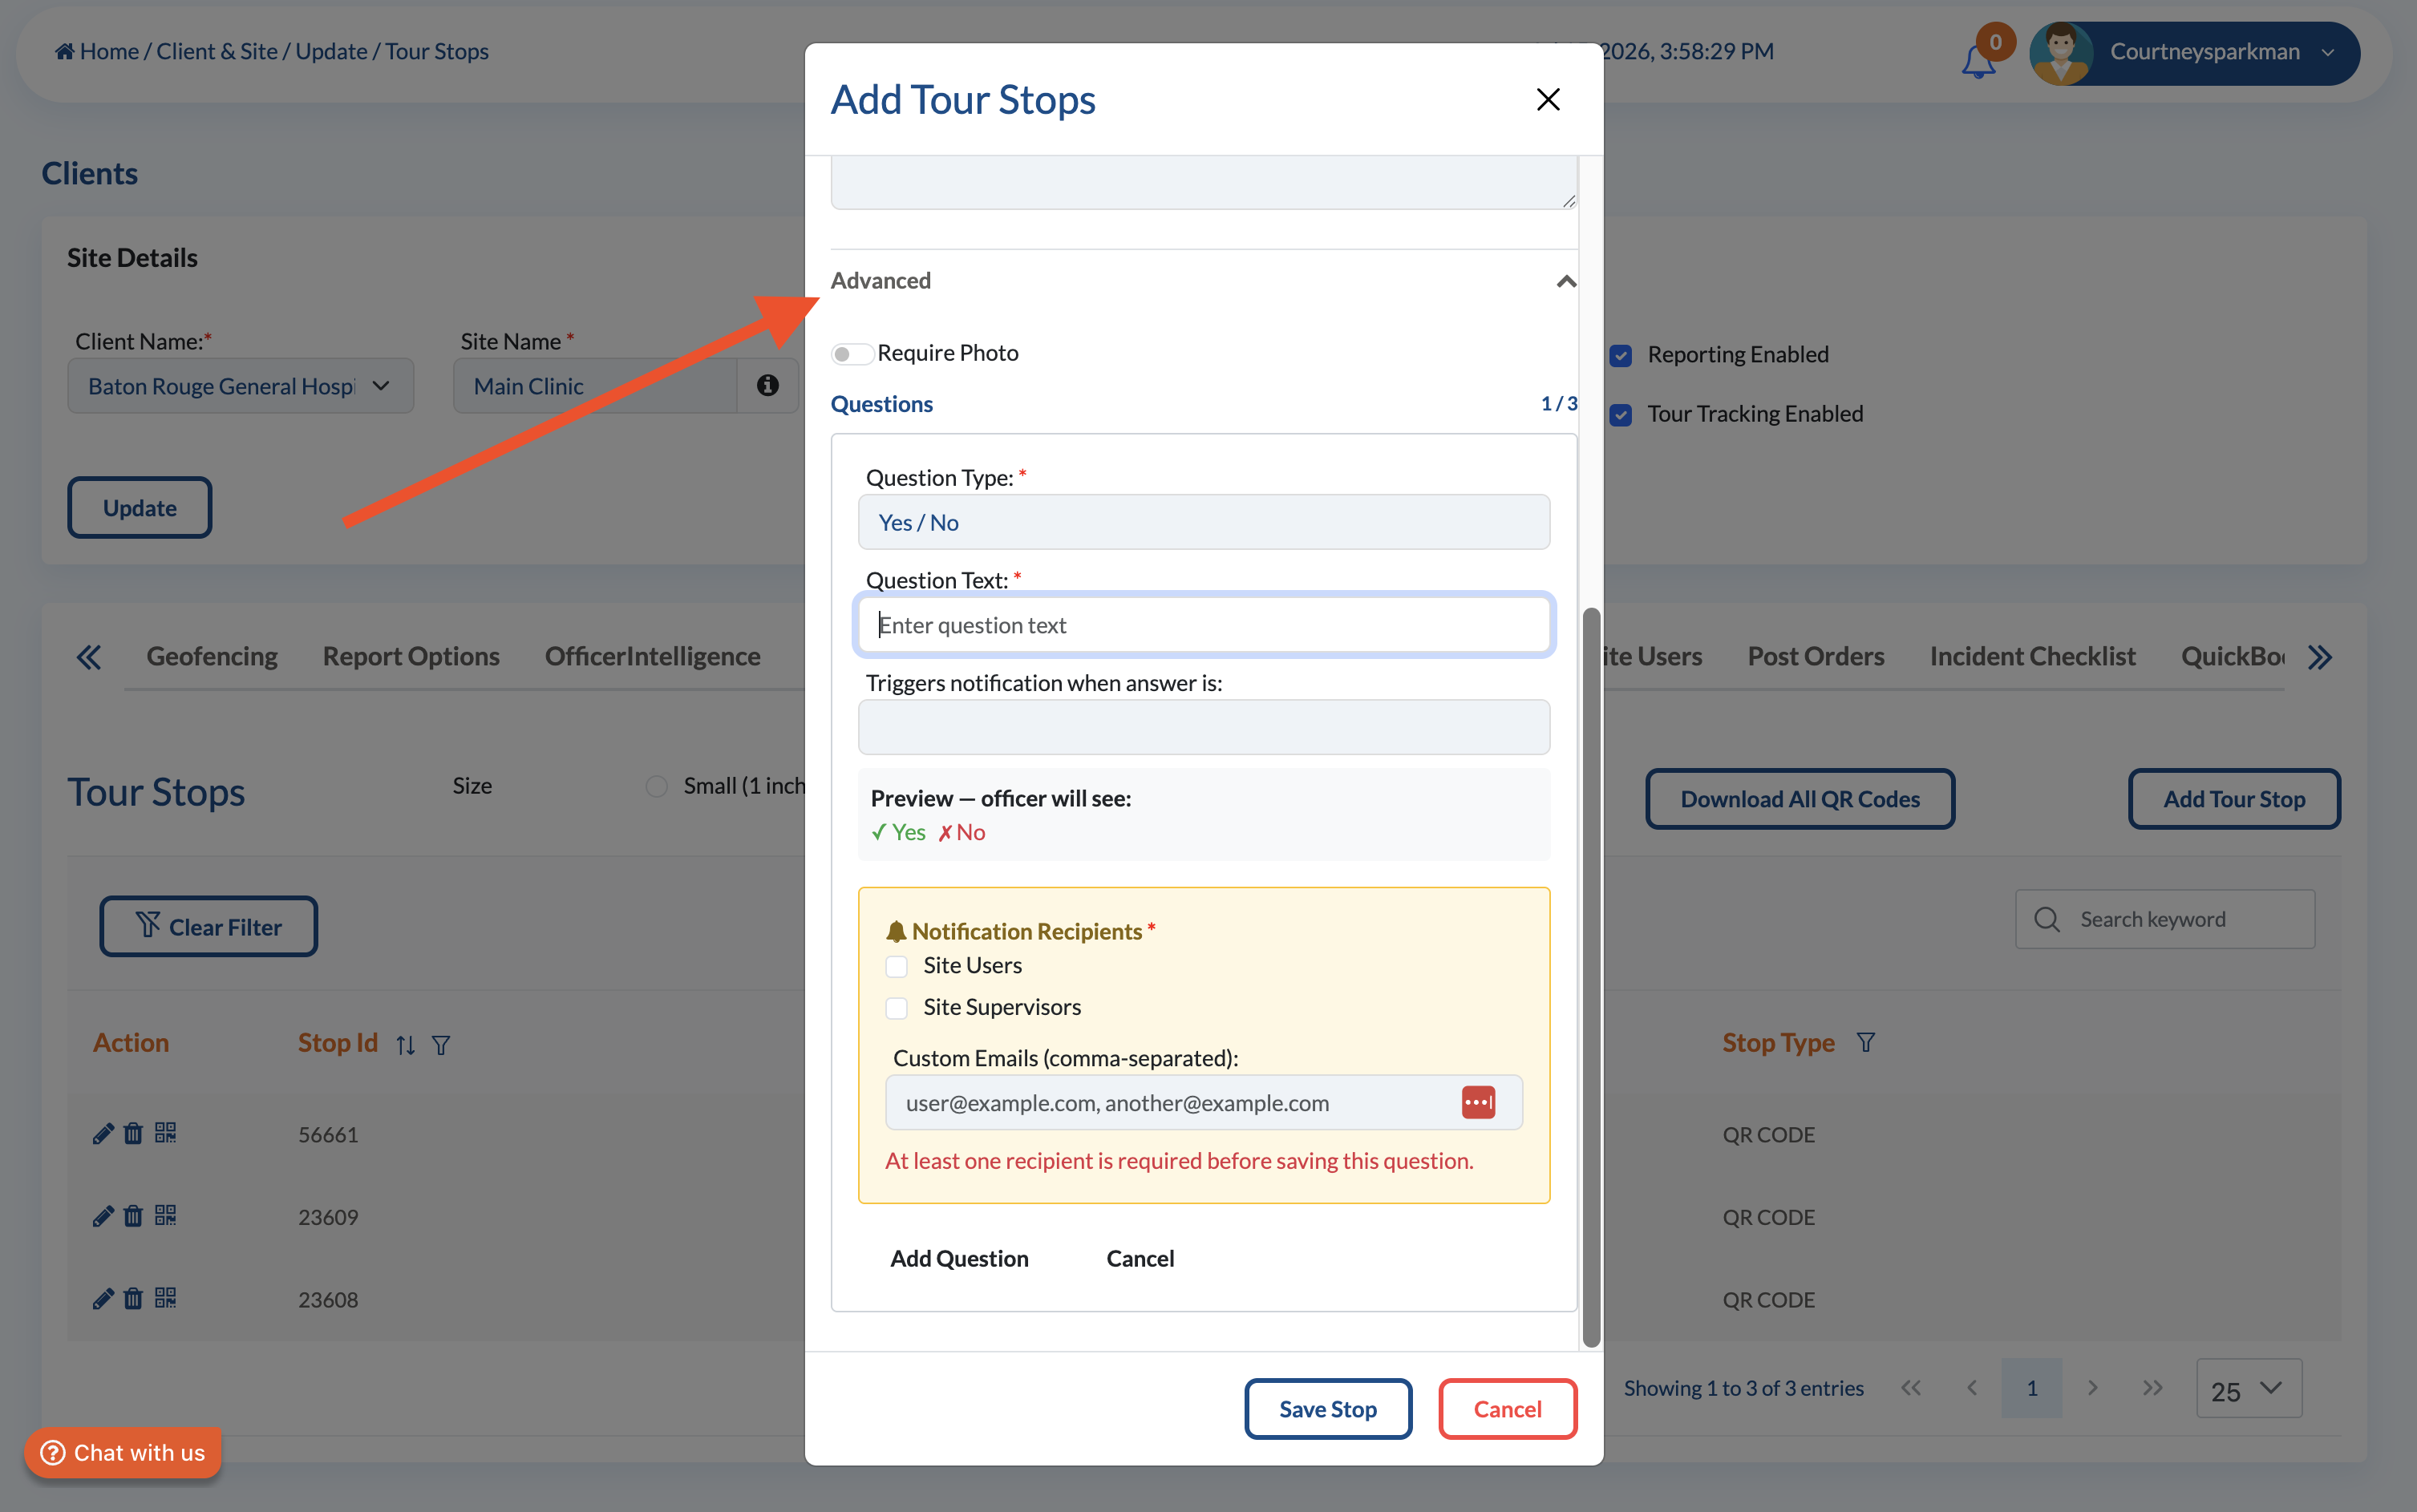
Question types
When adding a question, select one of three types:
Yes / No
The officer taps a green Yes or red No button. Use this for pass/fail checks like “Is the gate secured?”
Drop-down
The officer picks from a list of options you define. Use this for status checks like “What is the condition of the door?” with options such as Locked, Unlocked, or Damaged.
Range
The officer drags a slider between a minimum and maximum value you set. Use this for ratings like “Rate the lighting level (1–5).”
Setting up email notifications
Each question has a Notification section where you choose which answer triggers an alert and who receives it. At least one recipient is required before a question can be saved.
Trigger condition
- Yes / No: Choose whether the alert fires on a Yes or No answer.
- Drop-down: Check one or more options that should trigger an alert.
- Range: Set a direction (Below or Above) and a threshold value. “Below 3” sends an alert if the officer selects 1 or 2.
Recipients
- Site Users — all users associated with this site.
- Site Supervisors — supervisors assigned to this site.
- Additional emails — any external addresses. Type an address and press Enter to add it.
One email is sent per triggered question. If 2 of 3 questions trigger on the same scan, 2 separate emails go out. |
How it works for officers
Officers scan the stop as normal. If questionnaire settings are configured, the app adds steps before confirming the scan.
Photo (if Require Photo is on)
- The Photo Capture screen appears after the scan.
- Tap Open Camera and take a photo. The photo library is not available.
- Tap the preview to retake if needed, then tap Continue.
Questions (if questions are configured)
- Questions appear one card at a time, in order.
- Answer each question — Yes/No tap buttons, Drop-down picker, or Range slider.
- Tap Submit & Complete Stop once all questions are answered.
The Submit button is disabled until every question has an answer. Officers cannot skip a question. |
When done, the Scan Saved confirmation appears and shows “✓ Photo uploaded” and “✓ X questions answered” if applicable.
Reviewing results (Admin)
- Go to Reports → Tour & Patrol Tracking.
- Click any scan record to open the detail view.
- Scroll to the Inspection Data section.
This section shows the photo thumbnail (click to enlarge) and each question with the officer’s answer. Any answer that triggered a notification shows an amber ⚠ Alert sent label.
Offline support
Tour Stop Questionnaire works without an internet connection. The app caches each stop’s settings the last time it was online. When offline:
- Photos and answers are saved to the device.
- Everything syncs to OfficerReports automatically when connectivity is restored.
- Notification emails are queued and sent on reconnect.
Was this article helpful?
That’s Great!
Thank you for your feedback
Sorry! We couldn't be helpful
Thank you for your feedback
Feedback sent
We appreciate your effort and will try to fix the article