Custom Roles allow you to give a specific set of permissions to a group of users. We've provided steps on how this is accomplished and examples below.
ARTICLE CONTENTS
Step-By-Step: Create & Manage Custom Roles
Adding a Custom Role
Example: We want to give access to a user so they can run the Payroll report and export that information information. We also want them to be able to view the Clock In / Out Records.
- Click Setup.
- Click Manage Roles.
- Click the Add Role button.

- Enter a Role Name (in this example we've used Payroll Clerk)
- Check Customer Admin Portal, Officer Portal (or both).
The permissions displayed in the Define Permissions box will depend on the checkboxes checked here. In this example we have checked only Customer Admin Portal. - Check the permissions in the Define Permissions box that you would like to assign to this new role.
In this example we have checked the View / Read Only box under for:
Clock In / Out Records (Time and Attendance)
Payroll (Time and Attendance)
All permissions that are required for the boxes you check will also be automatically assigned.
- Under Data / Client Access click on the All Clients checkbox only select the Clients that you want to assign this role to.
In this example we've clicked All Clients.
- After selecting your Clients you'll also see a Assign Sites section appear. You can check All Sites or only the specific Sties you want to assign this role to.
In this example we've clicked All Sites
- Click the Submit button.
Important Note:
For a custom role user to be able to select sites, the Tour Stop (Reports) permission must be enabled. Without this permission, site selection will not be available to them.
Editing a Custom Role
If you need to make changes to a role you created please follow these steps:
- Click Setup.
- Click Manage Roles.
- Click the Edit (pencil) icon next to the Custom Role you want to edit.

- Make the required changes.
- Click the Update button.
Removing a Custom Role
If you need to remove a role you created please follow these steps:
Note: A role cannot have any users assigned to it when you go to remove it. You will have to change any users to a different role, from the one you want to remove.
- Click Setup.
- Click Manage Roles.
- Click the Remove (trashcan) icon next to the Custom Role you want to remove.

- A confirmation box will appear. Click Ok to remove the role.
Adding a User to a Custom Role
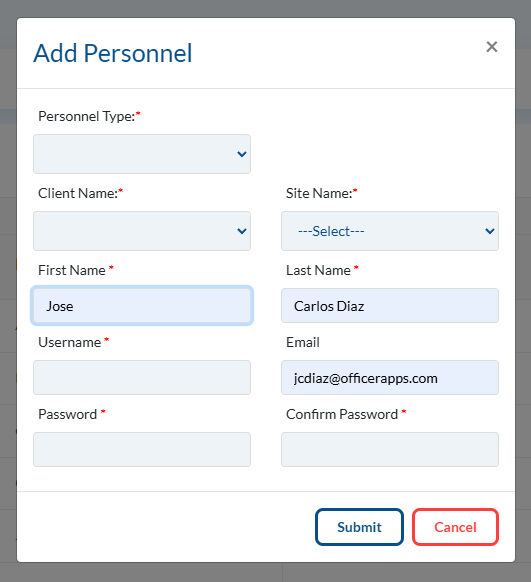
Once you have a custom role created you can create users with the role:
- Click Setup.
- Click Manage Roles.
- Click the Add User button

- Select the role you created from the Personnel Type dropdown box.
- Enter the following information:
- First Name
- Last Name
- Username
- Email (optional)
- Password
- Confirm Password

- Click the Submit button.
Was this article helpful?
That’s Great!
Thank you for your feedback
Sorry! We couldn't be helpful
Thank you for your feedback
Feedback sent
We appreciate your effort and will try to fix the article